Simulation Game

For our weekly Friday Forum, the EDR team participated in the Simulation Game, a fast-paced competition that uses DIVA/ArchSim to conduct basic thermal simulations, easily understand the results, and adapt their designs accordingly. The game is typically used in academic settings and has been used at Cornell, Harvard, MIT, RISD, and soon - Tulane. The game was developed first at Harvard and then at MIT - huge props to Christoph Reinhart and his team at the Sustainable Design Lab - thanks for making it FREE and accessible!
After everyone had their drink, the office was divided into 7 teams of 5-8 people. Each team was given the same project brief: design a 3000 m2 office building in Denver, Colorado and compete to see which team gets the lowest source EUI, all while spending less than 50 "DIVA Dollars."
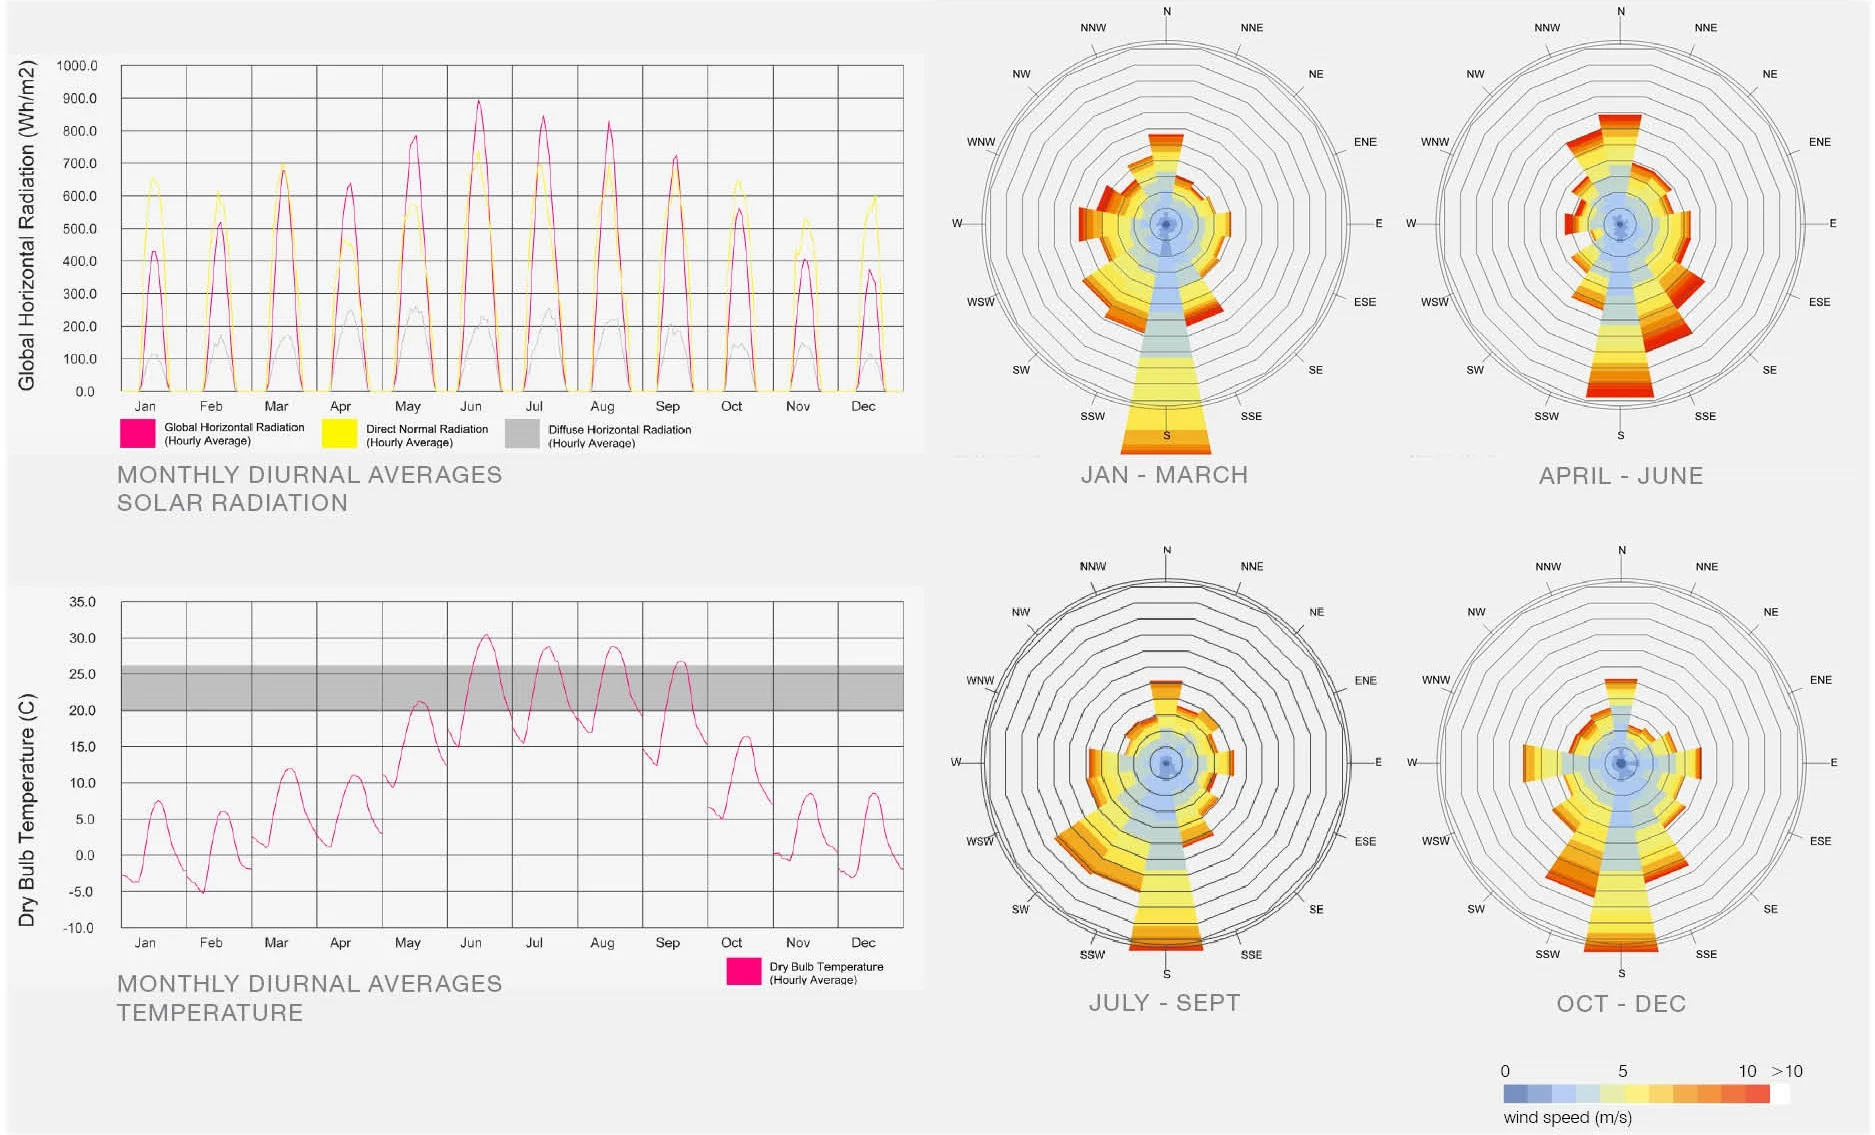
(Climate images by Reinhart, Dogan, Nagpal and Geisinger 2017)
Needless to say, Denver's climate is much different than ours.
Massing is built simply in rhino using boxes to represent each floor at 4m height. Each level represents a single thermal zone. The form is completely up to the design team, although no curves or NURBS allowed. Parametric windows by orientation (as well as automated horizontal shading) are included in the Grasshopper file. There is an option to have more control of the design of the windows and shading through custom geometry, however that option was not provided during the EDR game for sake of time. In summary, here are the steps to get to the first simulation:
1. Sketch – decide how to orient the building on the site and determine a general massing strategy.
(EDR team sketches from the game)
2. Model – simple massing model in rhino
3. Determine WWR (Window-to-wall-ratio) and horizontal shading strategy by orientation
4. Set envelope conditions
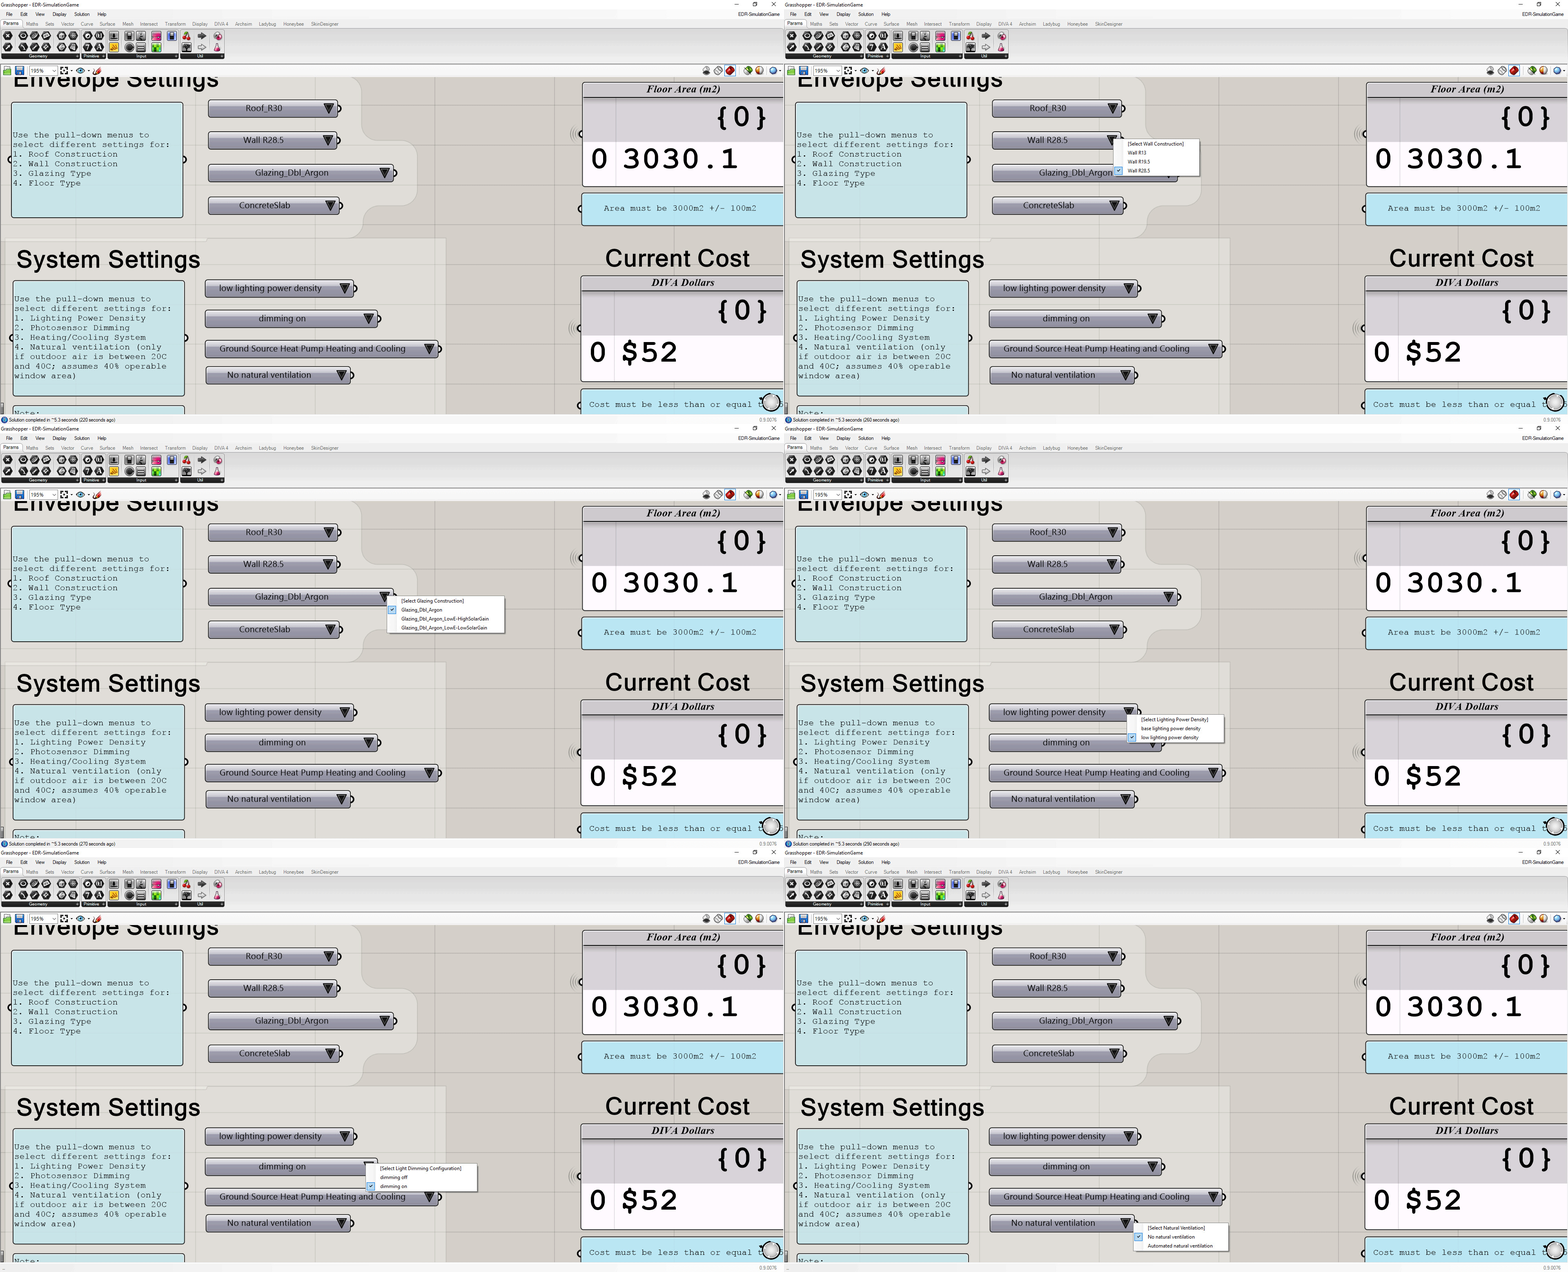
Here, teams could use the pull-down menus in the grasshopper script to select different settings for roof construction (R-20 through R-60), wall construction (R-13 through R-28.5), glazing type (double argon, double argon with low e high SHGC or double argon with low e low SHGC), and floor type (hardwood or concrete)
5. Set system settings
Next, teams use the next set of pull-down menus to select different settings for Lighting Power Density (base or low), photosensor dimming (on or off), heating/cooling system (electric baseboard heating with direct expansion cooling, gas-fired boiler heating with direct expansion cooling or ground source heat pump for both heating and cooling) and natural ventilation (which is only applied if outdoor air is between 20C and 40C and assumes that 40% of window area is operable)
6. Simulate! Iterate, adapt and simulate again!
Take a look at this quick video to show a few iterations:
It is helpful to run a simulation after each change to understand the direct impact on building heat losses/gains. Each time a simulation is run, the source EUI results will be recorded in Rhino.
Because of the quick pace of the tool, design strategies and emotions changed rapidly.
Javier's team (Mark R, Gianna and Li)
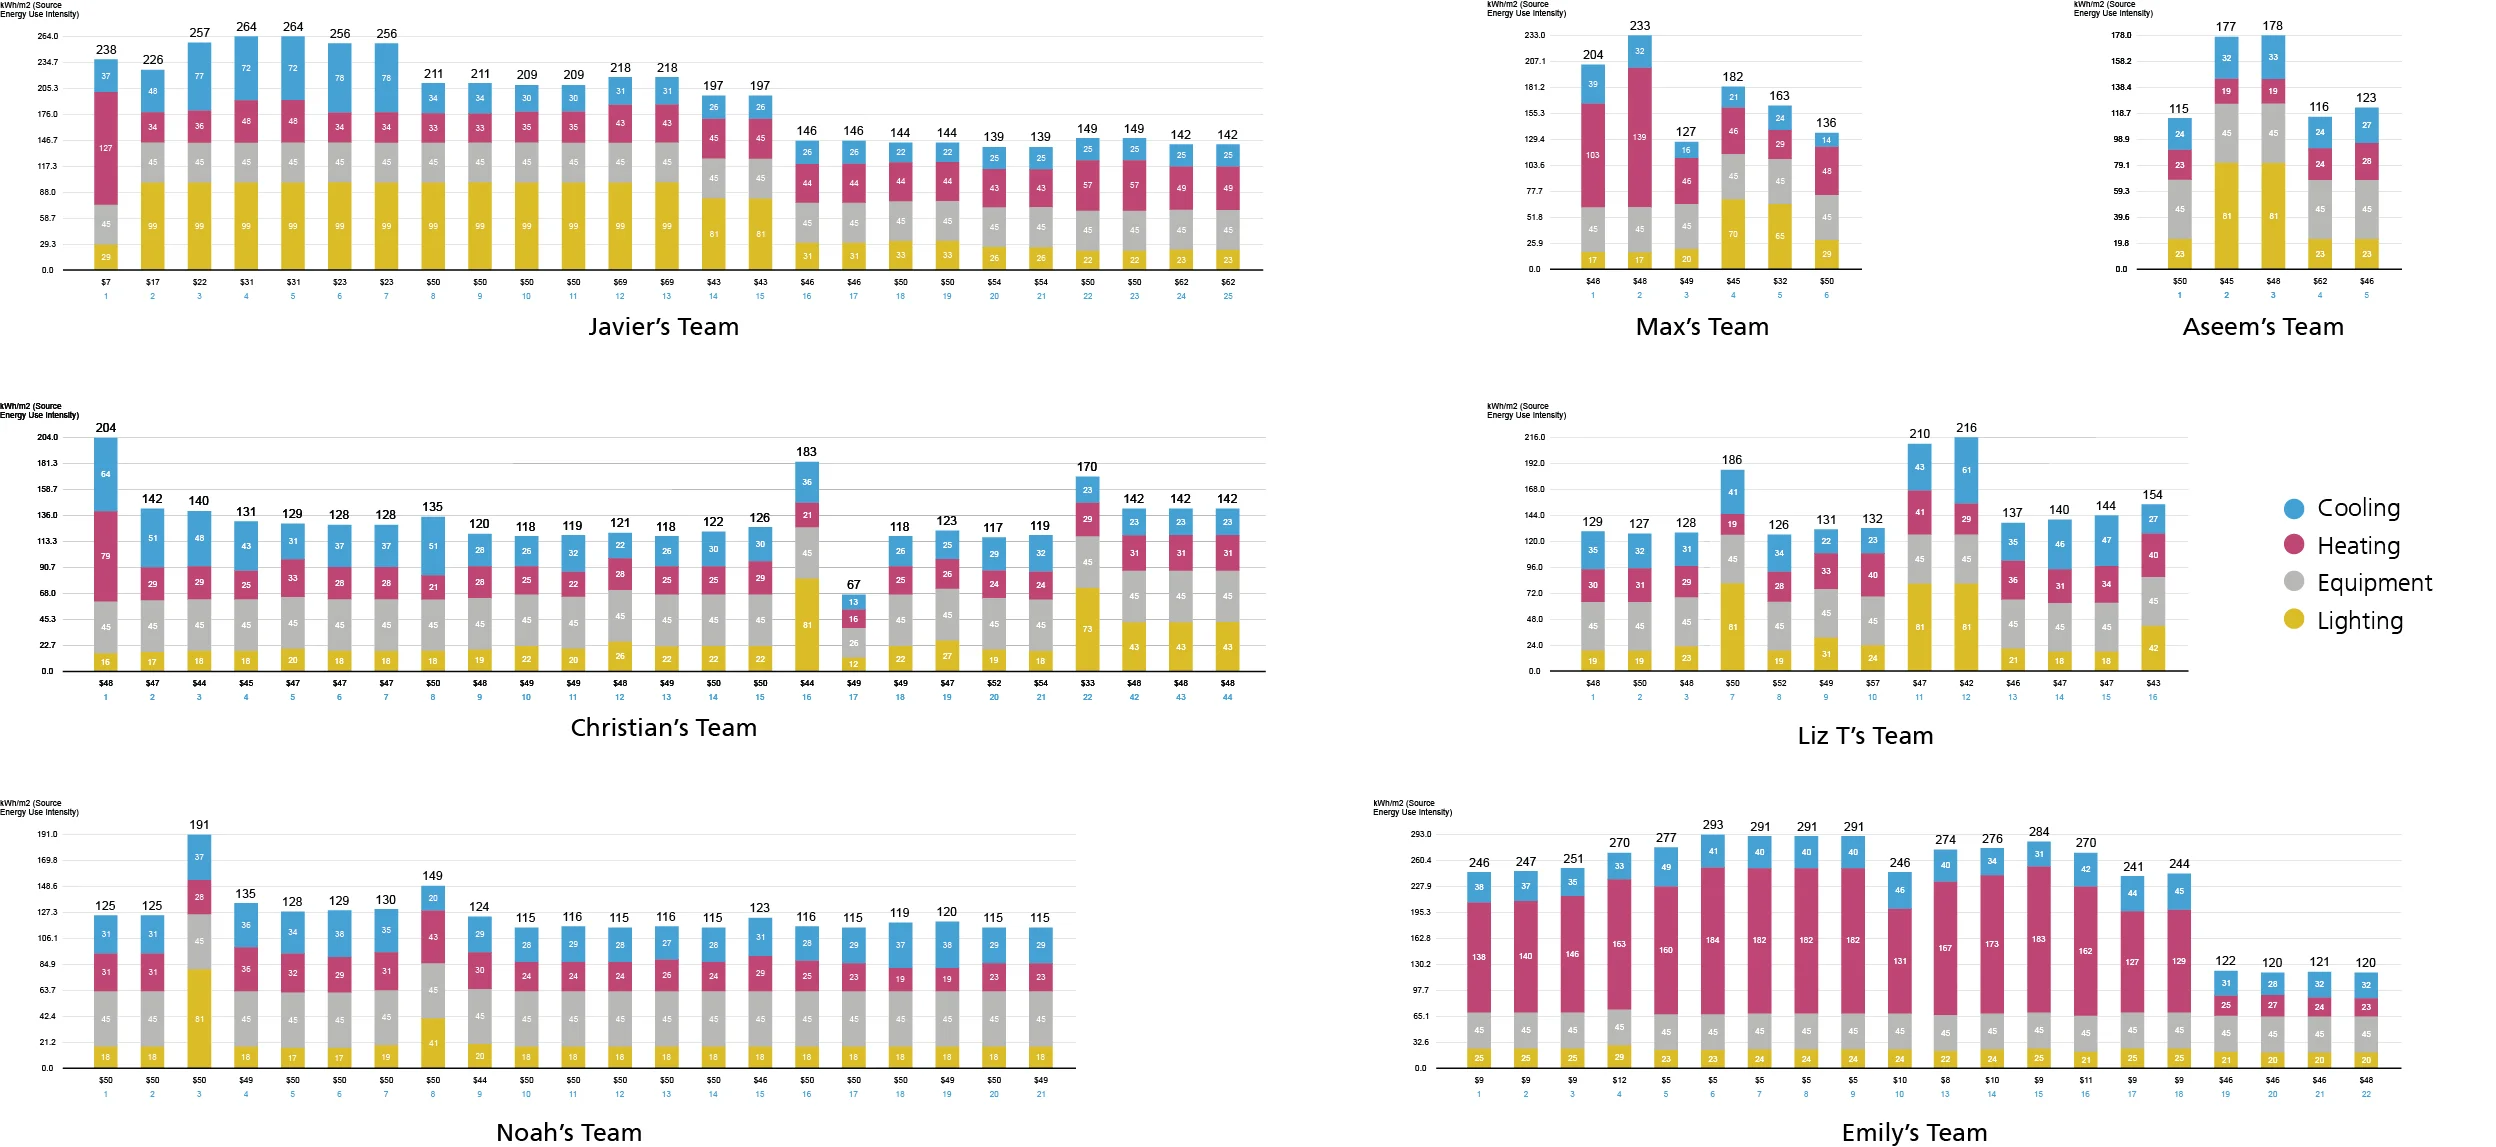
Javier's team did a great job running simulations after each iteration. It's clear by the downward trend of their results that they were able to respond to each specific decision. Two major improvements were made by enhancing roof and wall insulation AND turning on the dimming feature. How did your team compare??
All Results
With each simulation, you're also given a heat balance graph to break down exactly where the heat gains and losses are going. When heat losses (through envelope and infiltration) outweigh heat gains (through solar gains and free heat), the heating system kicks on.
And the winning team is.... NOAH'S team, with Ian, Mark T, Z, Tracy and Jenifer. Think they had an unfair advantage with Z as the Director of Building Technology?? The team designed a building with a SOURCE energy of 115 kWh/m2, spending $49 DIVA dollars. Good job, team!
Aseem's team came in a close second, ALSO scoring 115 kWh/m2, but they spent an extra DIVA dollar...


